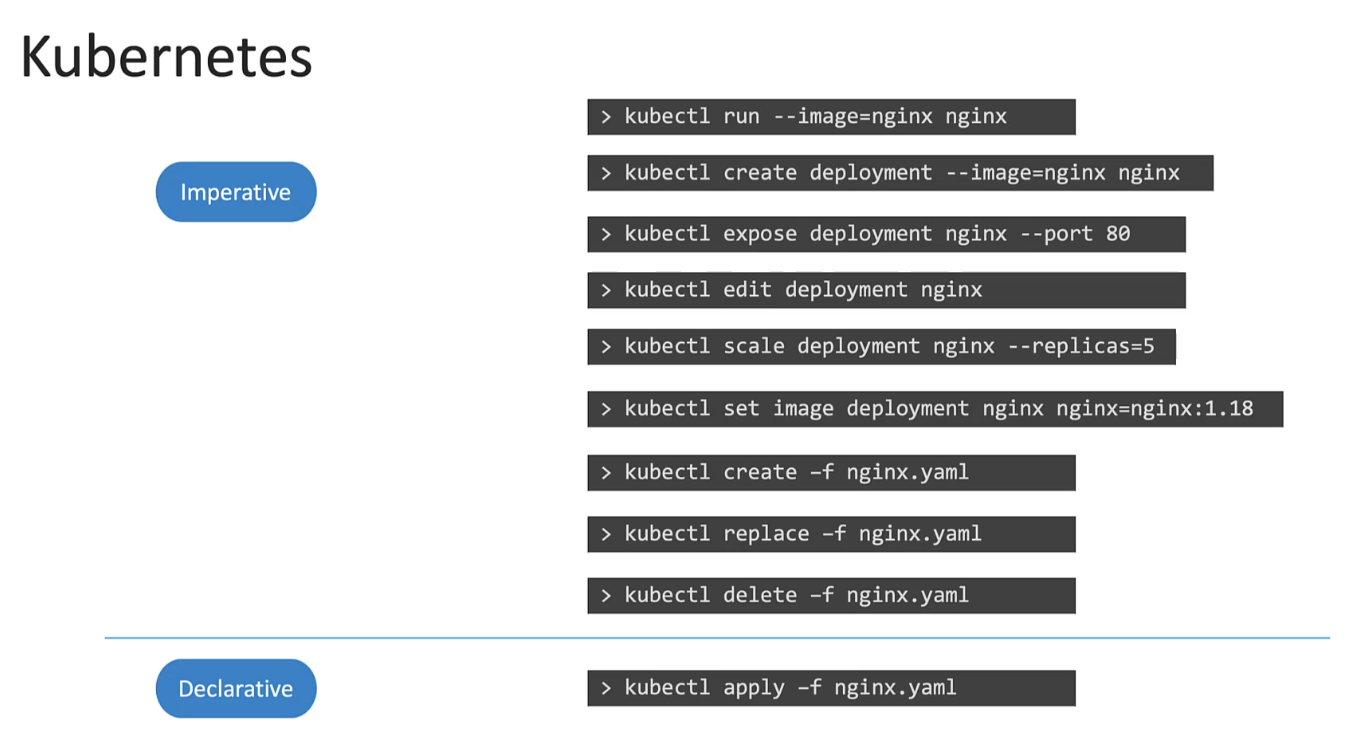
1.5 imperative and declarative approaches
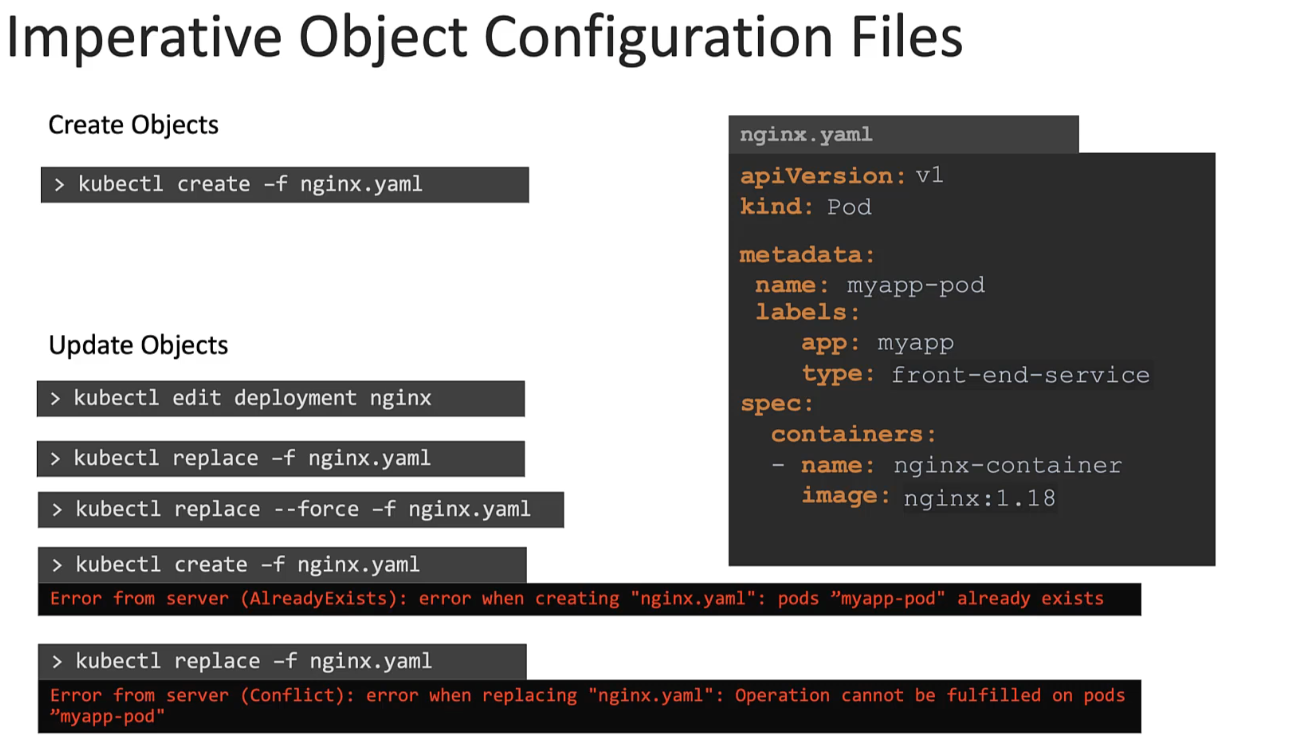
- Note : A more effective approach is to first modify the local copy of the object’s configuration file by updating the image name as needed, and then use the kubectl replace command to apply the changes and update the object.
-
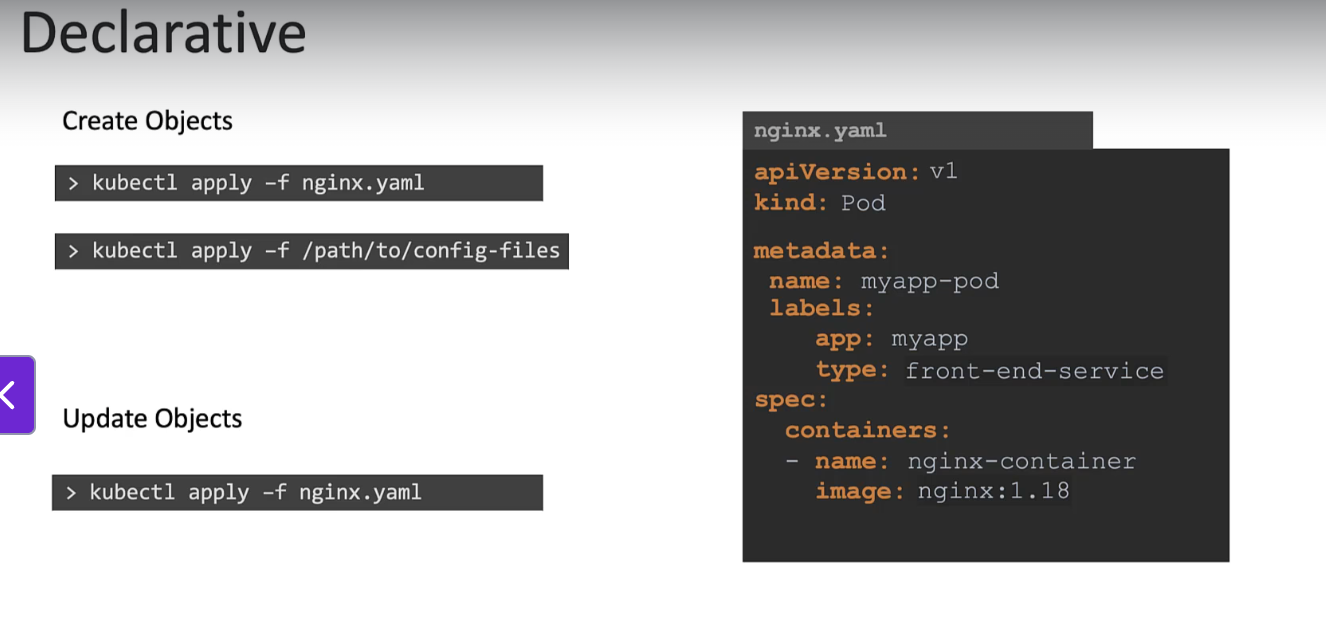
The declarative approach involves using the same object configuration files we've been working with. However, instead of using the create or replace commands, we use kubectl apply to manage the objects.
-
The kubectl apply command is smart enough to create an object if it doesn’t already exist. When working with multiple configuration files — which is common — you can specify a directory path rather than a single file, allowing all the objects in that directory to be created at once.
-
To make changes, simply update the relevant configuration file and run kubectl apply again. If the object already exists, apply will detect that and only apply the necessary updates.
-
This approach avoids errors about objects already existing or updates being invalid — kubectl apply automatically figures out the correct way to update the object based on the changes you've made.
Certification Tips – Imperative Commands with Kubectl
While you will mostly use the declarative approach with definition files, imperative commands are useful for quickly completing one-time tasks or generating YAML templates. This can save significant time during certification exams.
🔧 Key Options
-
--dry-run=client
Prevents the resource from being created. Useful for testing commands without making changes. -
-o yaml
Outputs the object definition in YAML format.
💡 Tip: Use both options together to generate definition files you can edit and apply later.
🐳 POD
Create an NGINX Pod
Generate POD YAML Manifest (dry-run)
🚀 Deployment
Create a Deployment
Generate Deployment YAML (dry-run)
Create Deployment with 4 Replicas
Scale a Deployment
Generate and Save Deployment YAML to File
Then, update the YAML file to add replicas or modify other fields before applying.
🌐 Service
Create ClusterIP Service for Pod redis on Port 6379
✅ Automatically uses the pod's labels as selectors.
Alternative: Create ClusterIP Service (Manual Selectors Required)
⚠️ Does not use pod labels. Assumes
app=redisas selector.
Create NodePort Service for Pod nginx Exposing Port 80 on NodePort 30080
✅ Uses pod's labels as selectors
⚠️ You cannot specify the nodePort in this command — must edit YAML manually
Alternative: Specify NodePort (Manual Selectors Required)
⚠️ Does not use pod's labels as selectors
✅ Recommendation
Use kubectl expose to generate the YAML and manually add the nodePort before applying it.